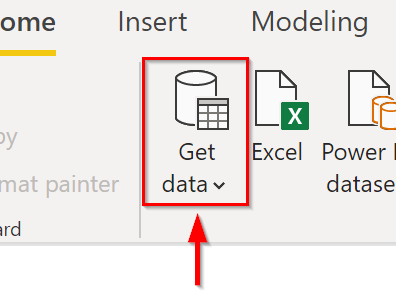
1. In Power BI, choose Get Data
In a new Power BI file, select “Get Data” to get a list of available data sources.
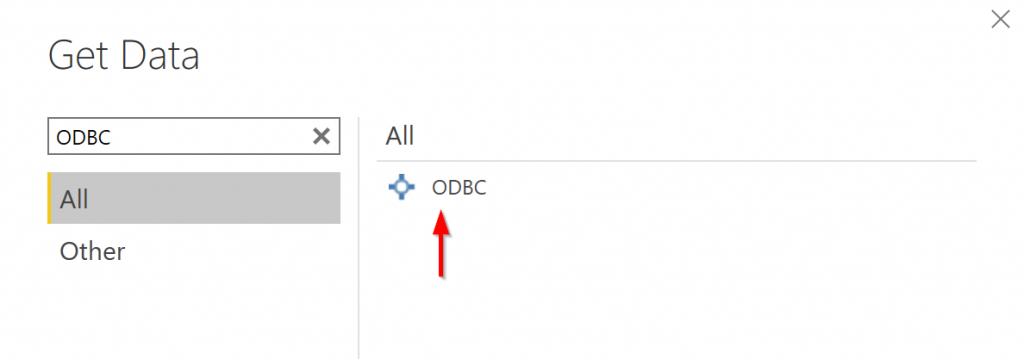
2. Search and Select ODBC connection
Choose the ODBC connection as the data source. It is easily found by searching.
Note: The Tracer installer installs the required drivers and libraries that Power BI uses for SQLite ODBC connections.
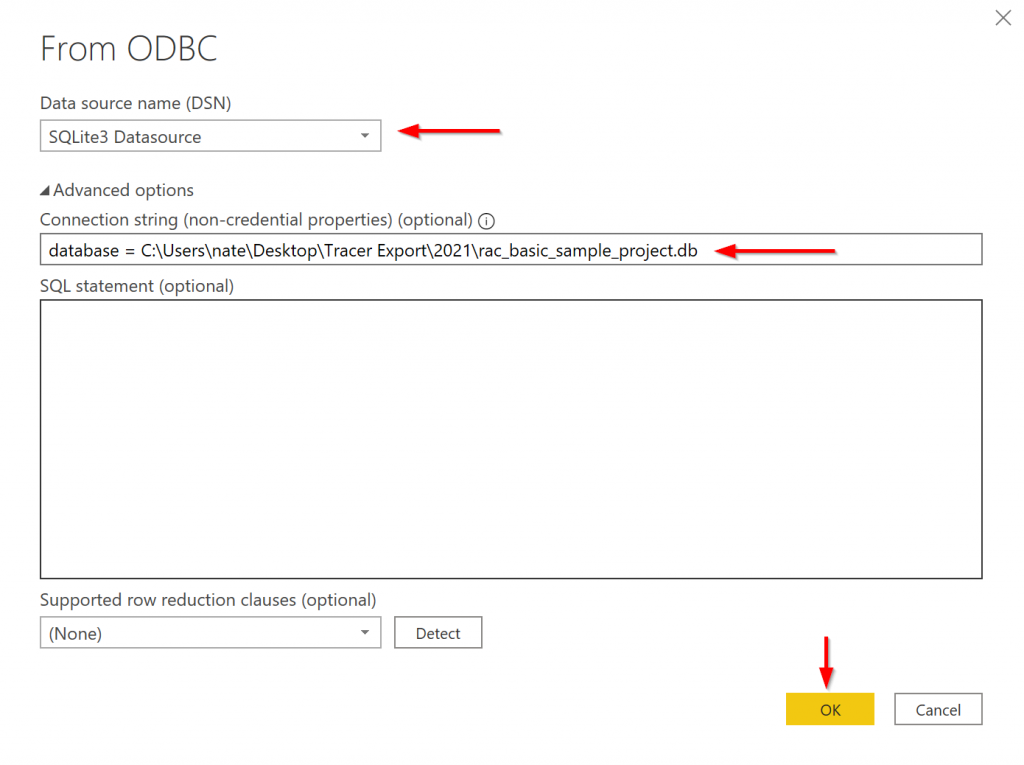
3. Set SQLite3 Datasource and Set Connection String
Under Data source name (DSN), select SQLite3 Datasource.
Under Advanced options, set a connection string using: database = PATH TO YOUR SQLITE FILE
Choose OK
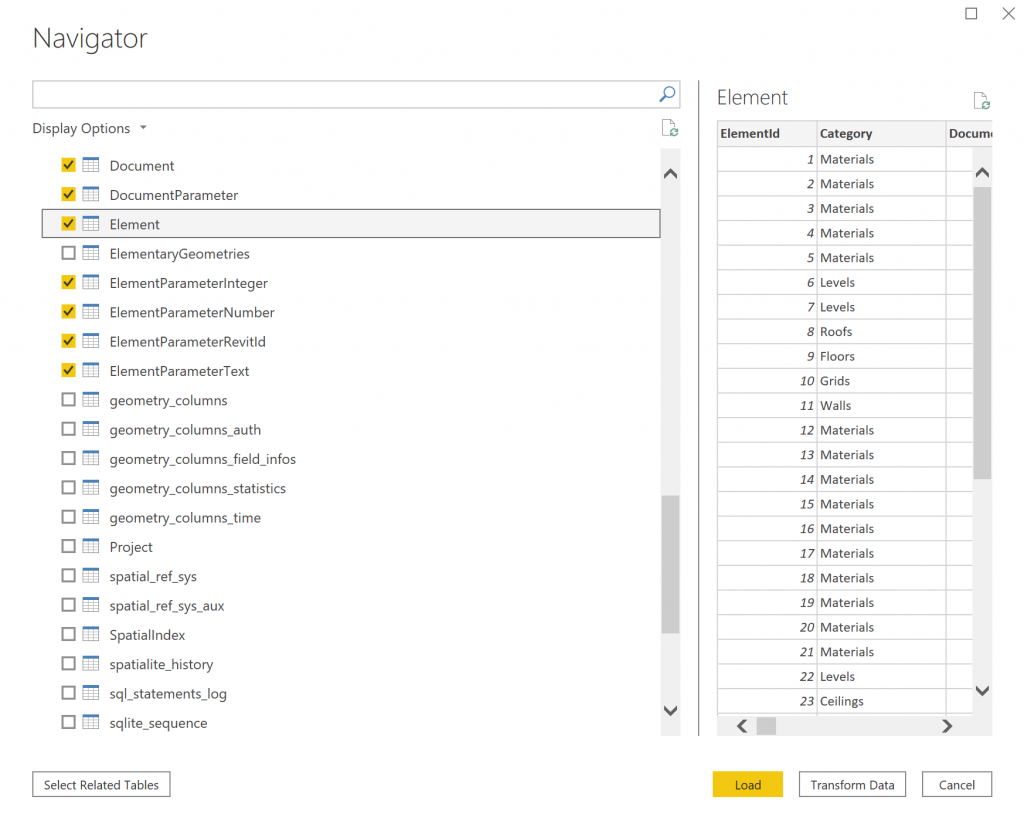
4. Select Tables to Import into Power BI
After connecting, select the tables to import. The primary tables in the Revit exported SQLite data model are:
- Document
- Element
- ElementParameterInteger
- ElementParameterElementID
- ElementParameterNumber
- ElementParameterText
There are also a number of pre-defined SQLite views that leverage the above tables for convenient data access. For example: The “RoomElements” view contains a table of all room elements and parameter fields.
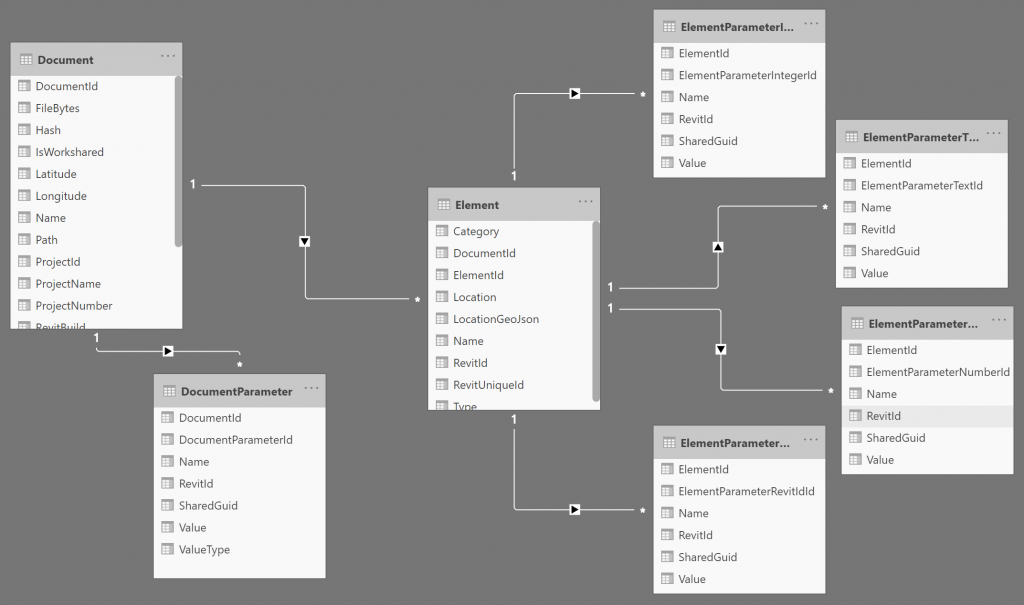
5. Verify Table Relationships
Under the Power BI “Model”, review the table relationships. The following is a setup showing the one-to-many joins between the primary Revit exported SQLite tables.