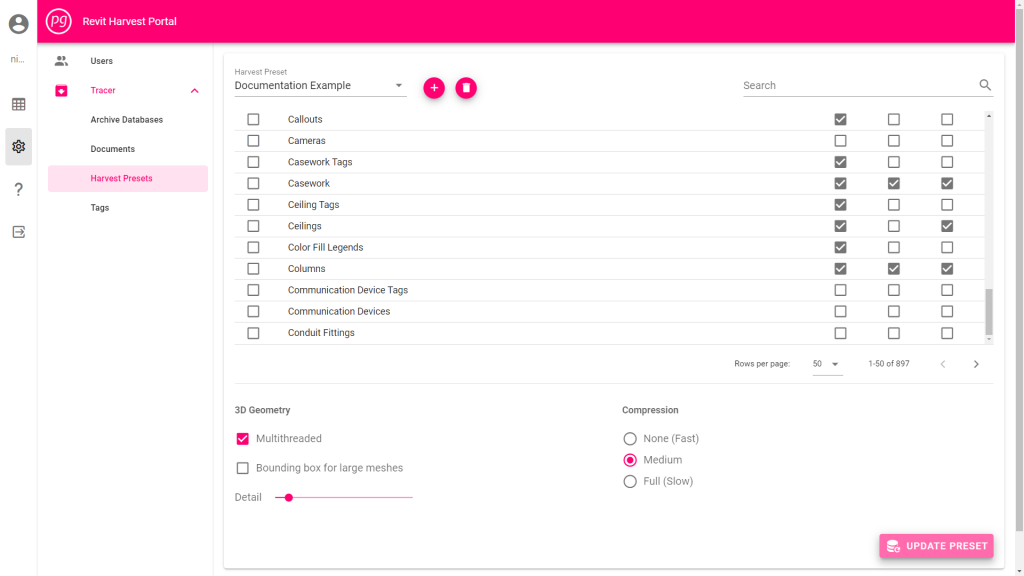
Navigate to the Harvest Preset Menu
- Select “Admin”, or the Gear icon, from the collapsible main menu
- Select “Harvest Presets” from the Admin > Tracer submenu

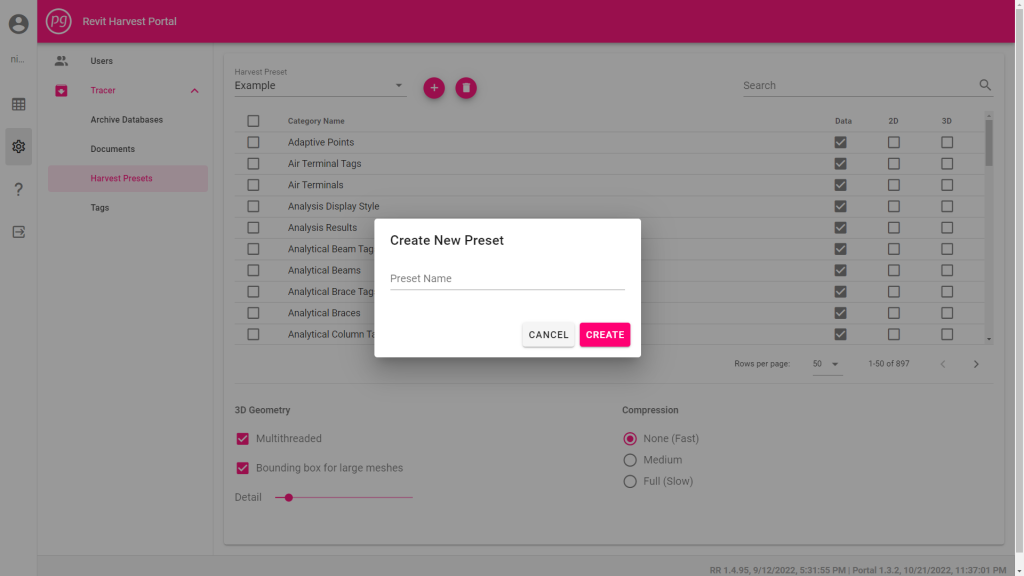
Create a New Preset
- Select the “+” Icon at the top of the Harvest Preset Menu. The Create New Preset window will appear.
- Enter a unique name for the new preset.
- Select “Create”
- The new preset will be created with default settings applied. See the next section for details about editing a preset.
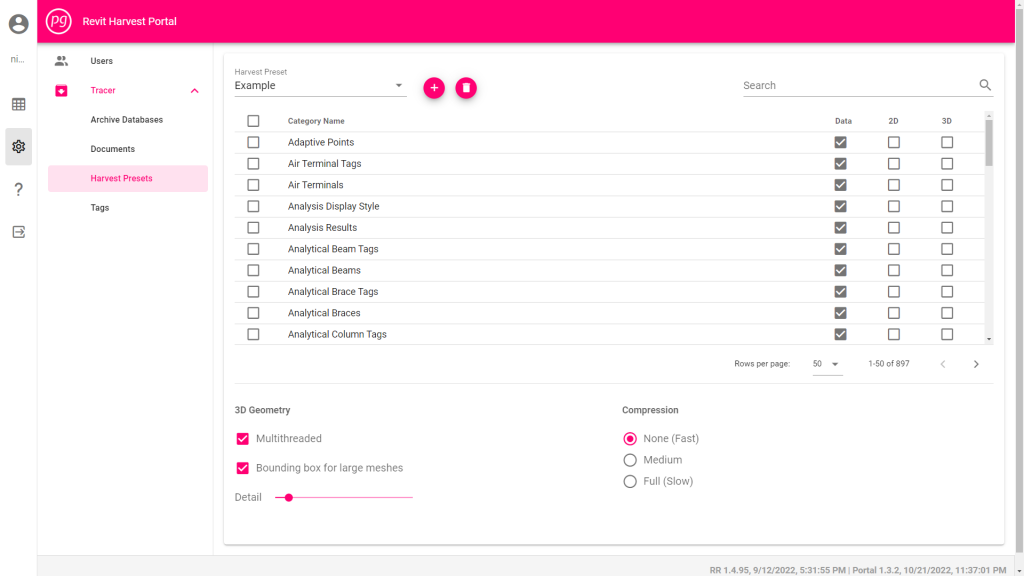
Edit a Preset
- Choose a preset to edit from the drop down list at the top of the Harvest Presets page
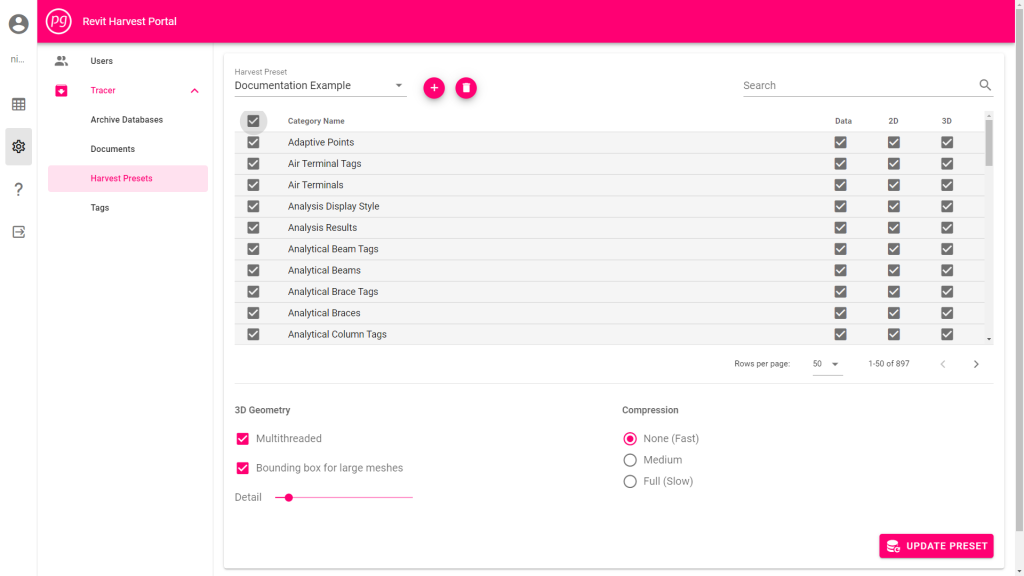
- Select which elements you wish to include in the preset by category name.
SELECTIVE BY CATEGORY: Check boxes in the Data, 2D, and 3D columns to selectively dictate which elements will be harvested by category.
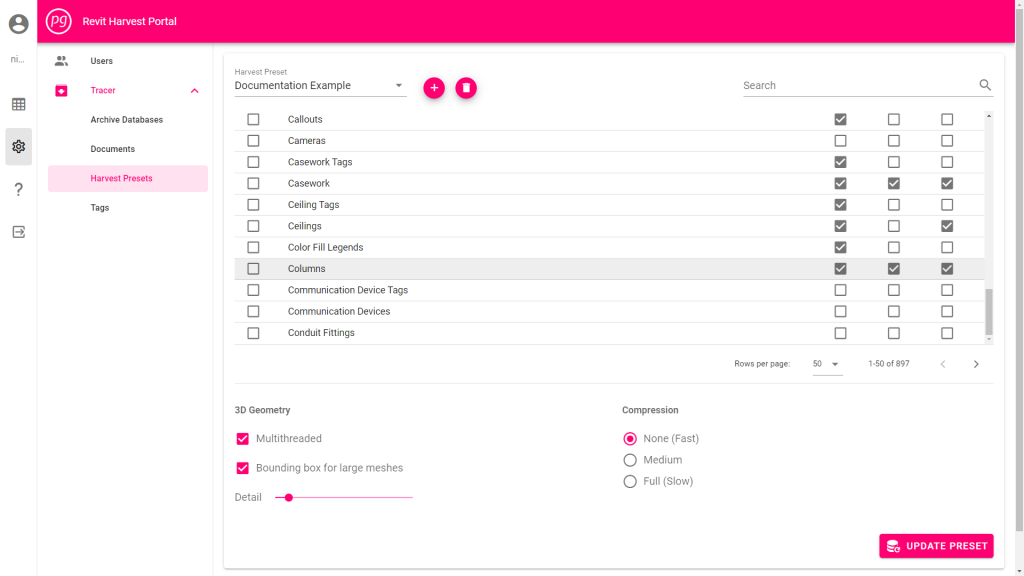
SELECT ALL FOR CATEGORY: Checking the box on the left side of a category name will select all of the data, 2D, and 3D geometry for that Category.
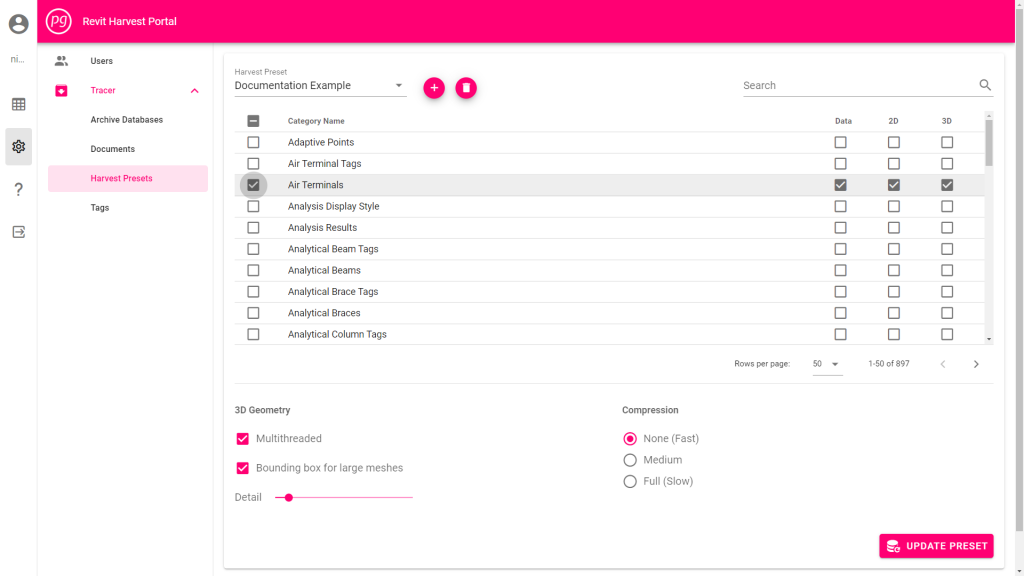
SELECT ALL: Checking the box in the top left corner of the table, in line with the table headers, will include ALL of the data, 2D, and 3D geometry to be harvested.
HELPFUL HINTS:
- Rows by Page: Drop down to select the number of Rows to return per page.
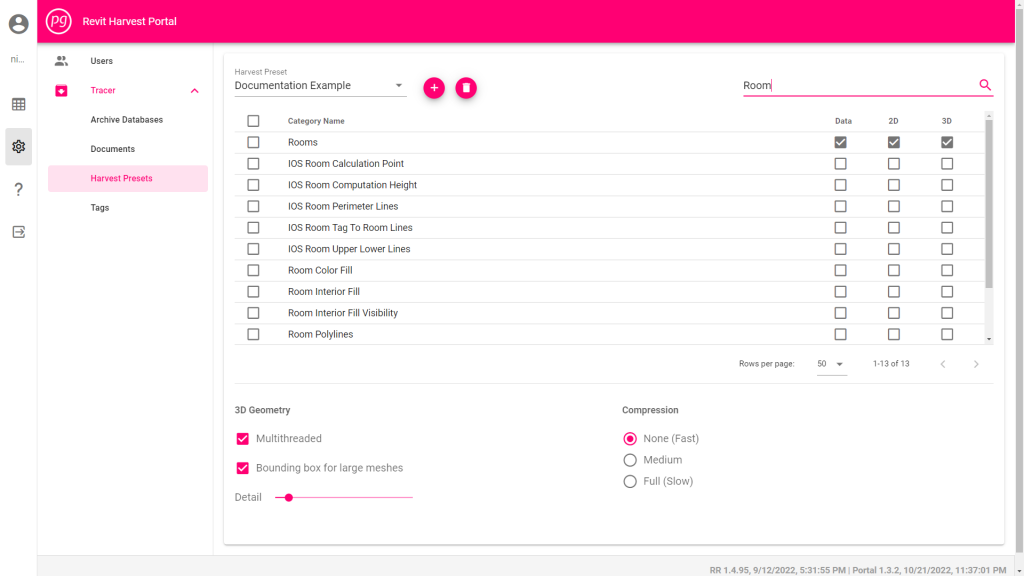
- Search Function: The top right corner of the screen has a search bar that will filter down the Categories list.
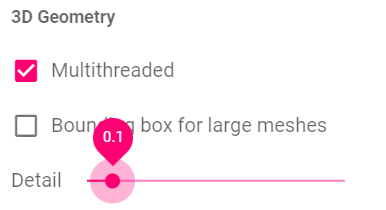
- Adjust 3D Geometry Settings:
- Multithreaded: If checked, this feature allows multiple tasks to process concurrently, which can improve speed.
- Bounding Box for Large Meshes: If checked, Tracer will replace the 3D data for large meshes with a Bounding Box. While the resulting file size will be smaller and faster to render images, some of the objects may not be visible. Uncheck the box to disable this feature and allow Tracer to process meshes of any size.
- Detail: Move the dot along the slider to set the desired detail level. A lower level of detail will process more quickly, while a higher level of detail will display curved or highly detailed object more accurately. When the dot is selected, a numeric value should appear indicating the level of detail on a scale of 0 to 1. The default Tracer setting is “0.1”.
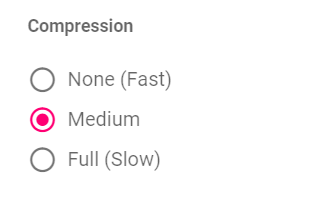
- Adjust the Compression settings
- The Compression feature allows users to extract data and create database files with a reduced size, allowing the file to be used more efficiently. The higher the level of compression is set, the longer the file will take to export.
- Choose “None (Fastest)” to avoid compression.
- Choose “Medium” to allow some compression with a marginally longer processing time.
- Choose “Full (Slow)” to allow the maximum amount of compression, with the tradeoff of a substantially longer processing time.
- Select the “Update Preset” button in the bottom right corner to confirm the changes.
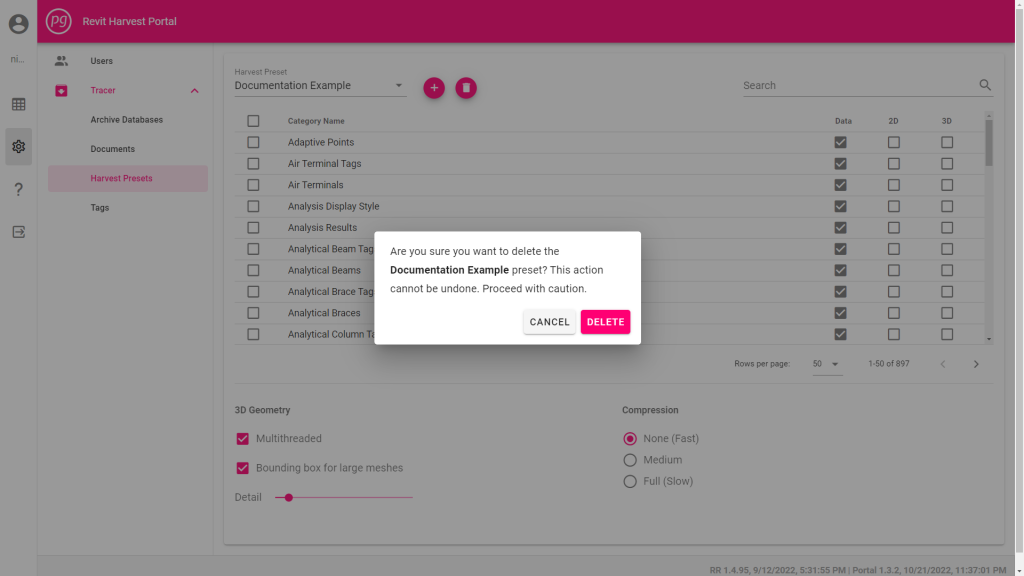
Delete a Preset
- Select a preset by choosing its name from the dropdown menu in the top left corner.
- Select the trash bin icon, located to the right of the dropdown menu. A warning window will appear.
- Select “Delete” to permanently delete the preset.