Start a Harvest Task
- From the Harvest Tasks page, select the “+” button in the top right corner, next to the search bar. The Harvest Revit Model window will appear.
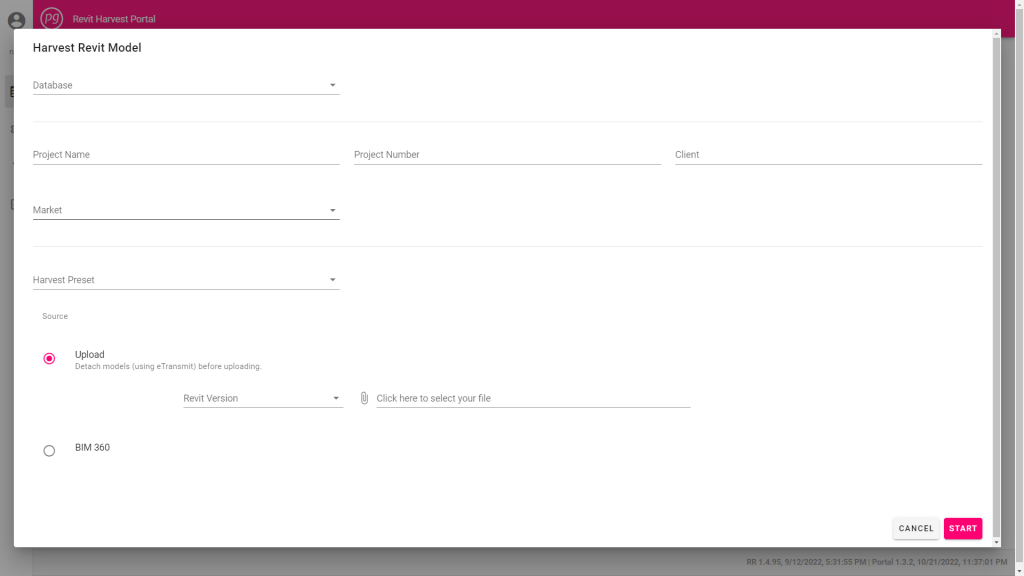
- Complete the Harvest Revit Model form
- Select a Database from the dropdown menu. Learn more about Database Management…
- Type in a Project Name, Project Number, and Client name
- Select a Market from the Dropdown Menu.
- Select a Harvest Preset from the Dropdown Menu
- Select a model to process. You can choose to Upload a model from your computer’s files or direct the Harvester to a BIM360 model on the cloud.
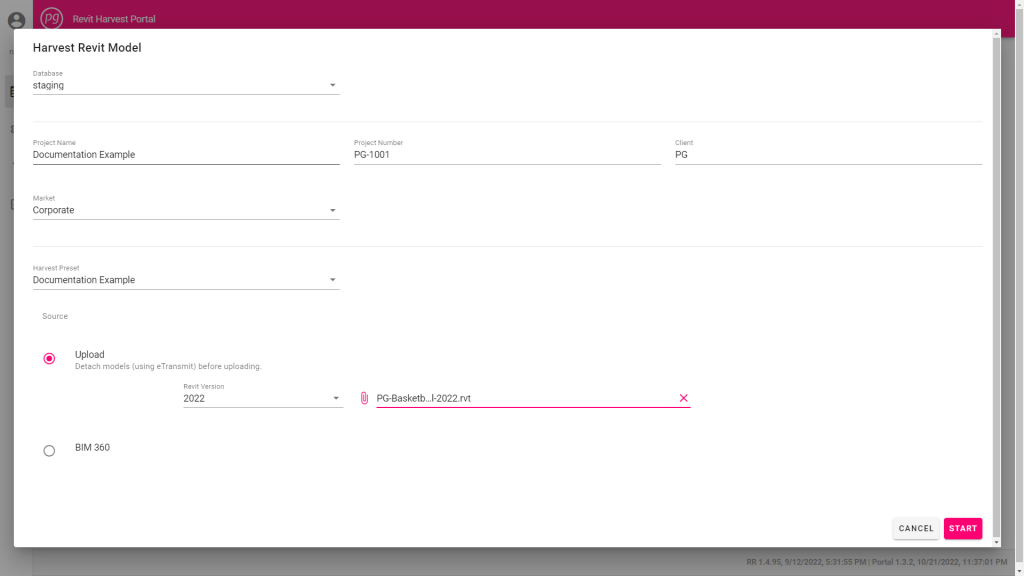
- To Upload:
- Select the correct Revit Version from the dropdown menu
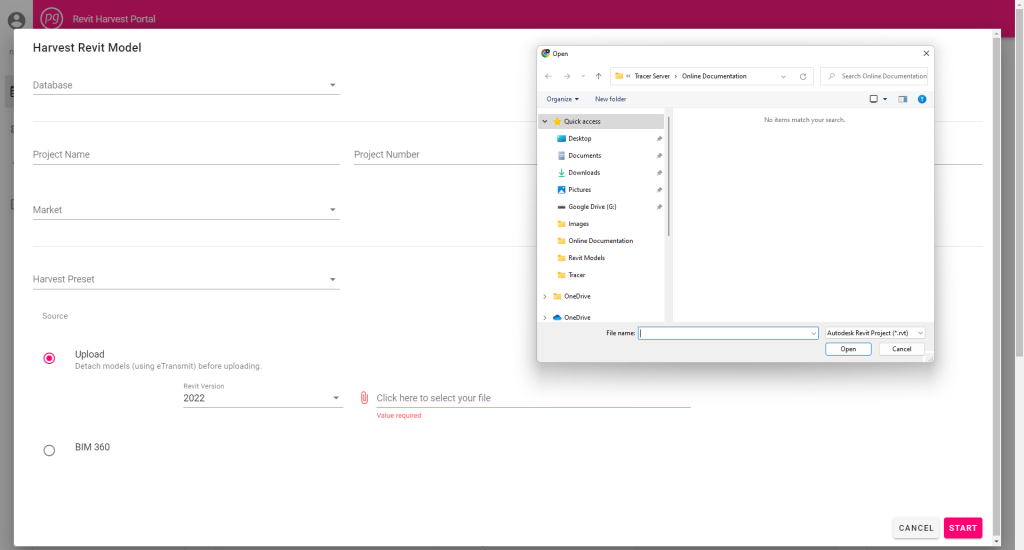
- Select “Click here to select your file”. A file browser window will open.
- Navigate to the file you wish to harvest and then select “Open” to proceed.
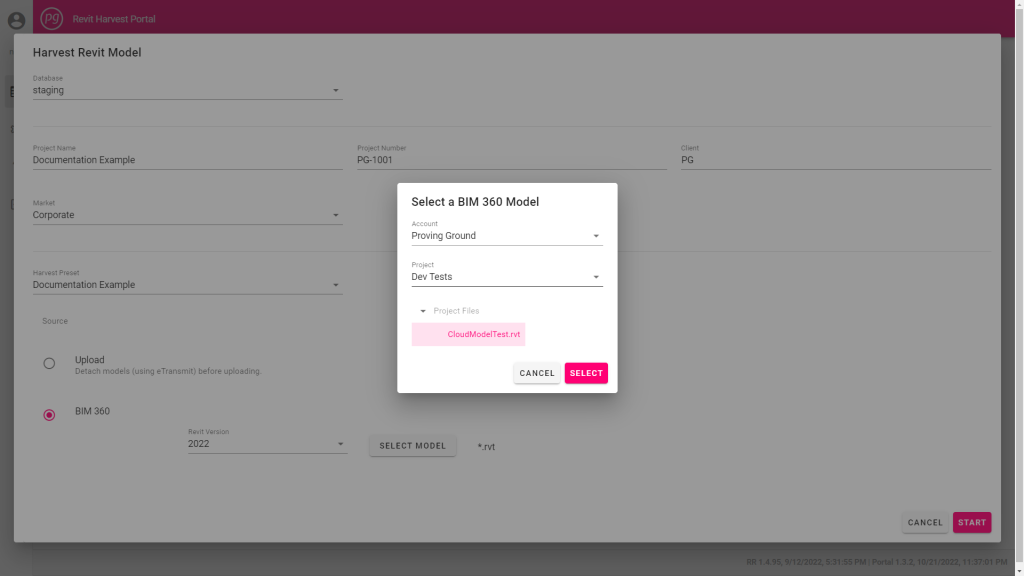
- To Select a BIM 360 Model
- Select the correct Revit Version from the dropdown menu
- Click “Select Model”. The “Select a BIM 360 Model” window will appear.
- Select the correct Account name from the dropdown menu.
- Select the Project from the dropdown menu.
- Click on “Project Files” to show a list of available files.
- Select the file you wish to harvest, then choose “Select”
- Verify that the settings are correct and select “Start” to begin harvesting. The Harvest Revit Model window will close, returning you to the Harvest Tasks page.
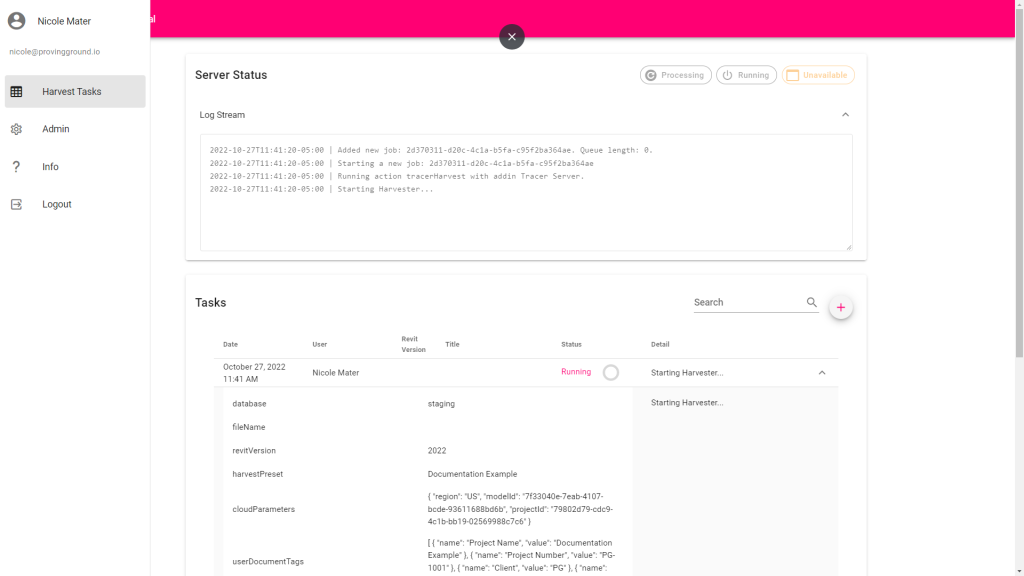
View Harvest Task Details
Select an item from the task log to open a drop down panel with additional details about the Harvest Task.
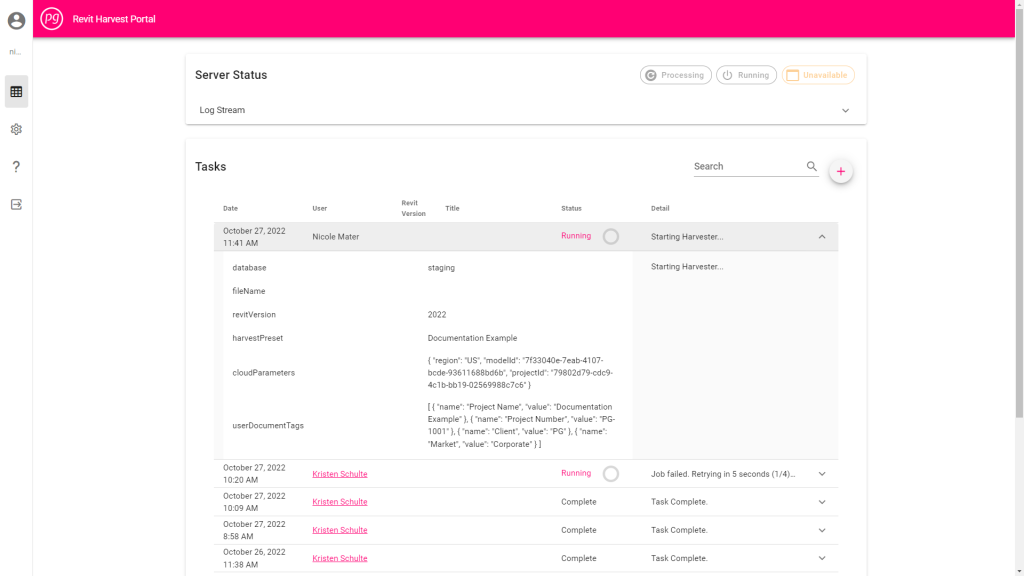
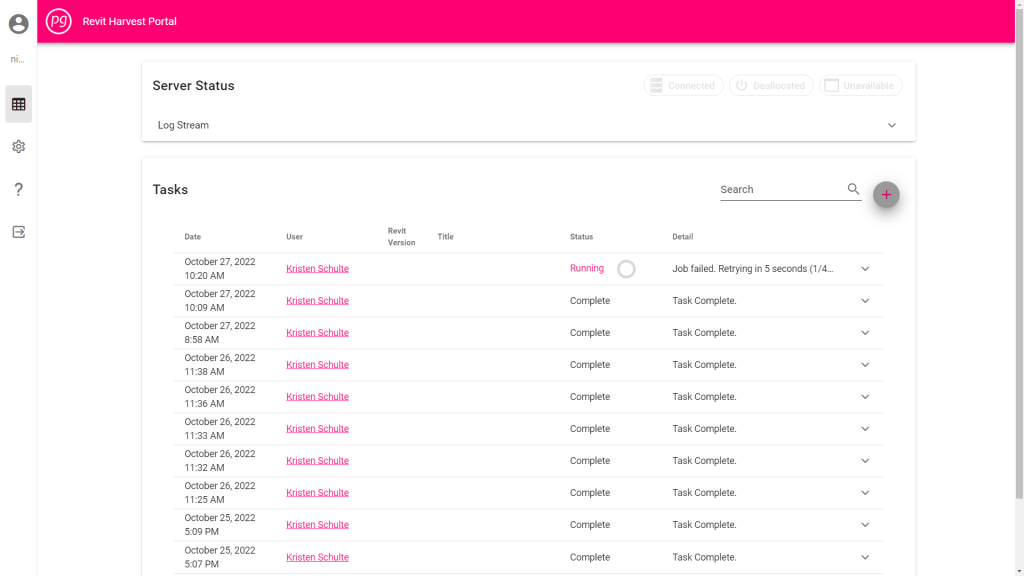
Server Status
At the top of the Harvest Tasks page, there is a panel titled “Server Status”. Status indicators are located in the top right corner of the panel.
- Portal Server Status: Indicates whether or not you are connected to your server.
- Harvester Machine Status: Indicates whether the Harvester Machine is Running or Deallocated.
- Harvester App Status: Indicates whether the App is available or not. When the Harvester is actively running, the “Unavailable” icon will be highlighted.
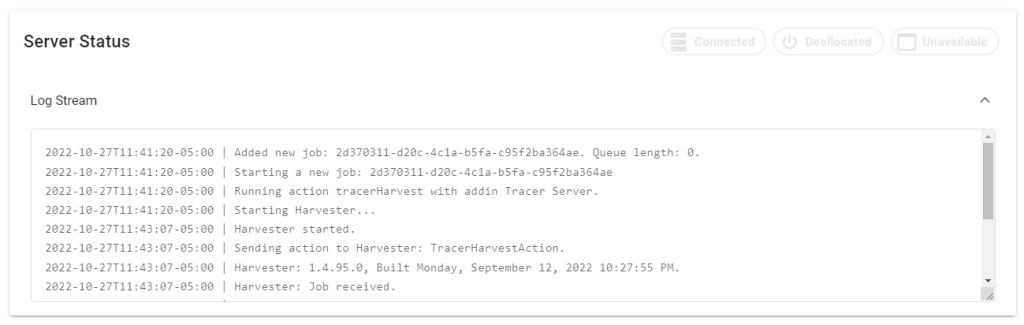
Log Stream
Select the carat at the bottom right corner of the Server Status menu to open the Log Stream panel
The Log Stream shows a history of the actions that the server has taken during your session of Tracer Server, including error messages and processing times.