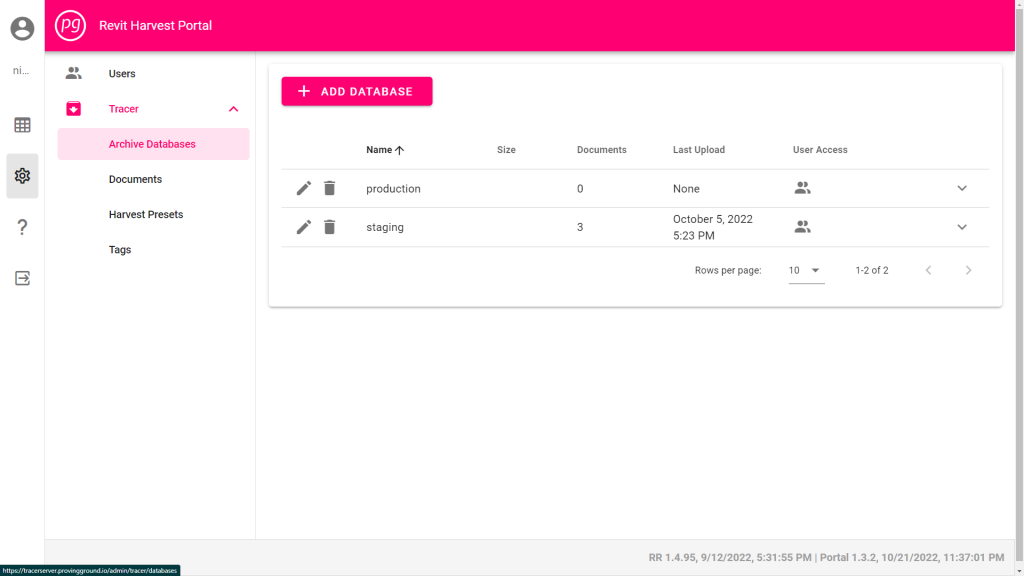
Database Management Panel
- Select “Admin”, or the Gear icon, from the collapsible main menu on the left side of the screen.
- Select “Databases” from the Tracer submenu
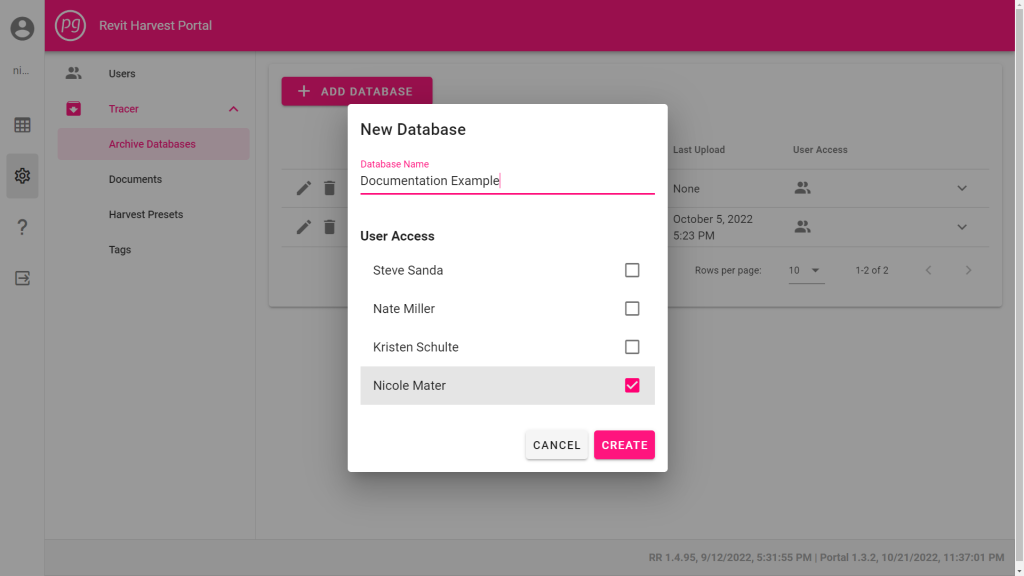
Create a New Database
- Select the “Add a Database” button. A New Database window will appear.
- Type in a unique name for the new database. The name cannot be edited after the database has been created.
- Check the boxes for each user that should have access to the database. User access can be edited at any time.
- Select the “Create” button. The window will close and return to the Database Management Panel, where you should see the new database in the table.
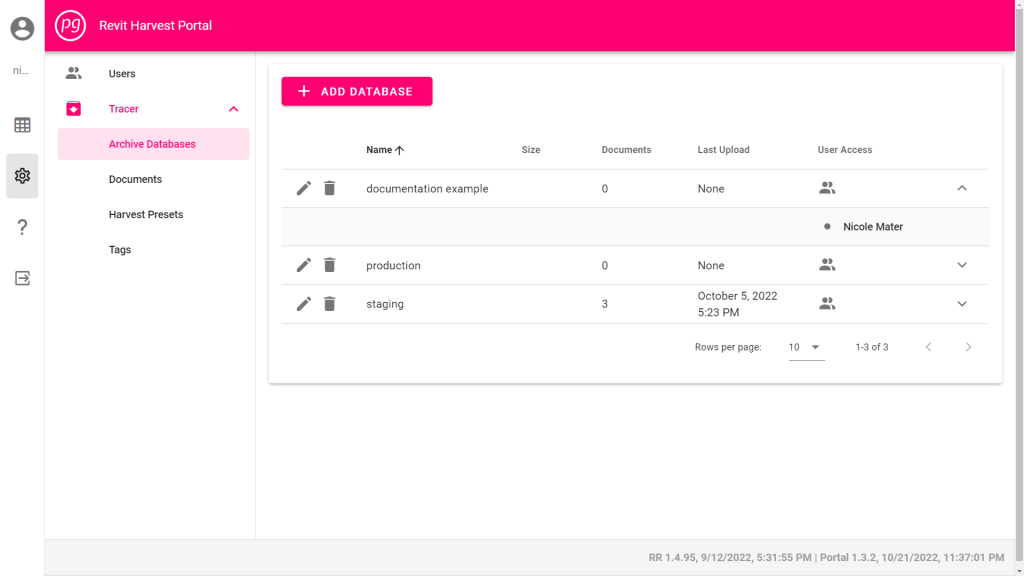
- Select the down carat at the right side of any row to drop down a panel that shows which users have access to the database.
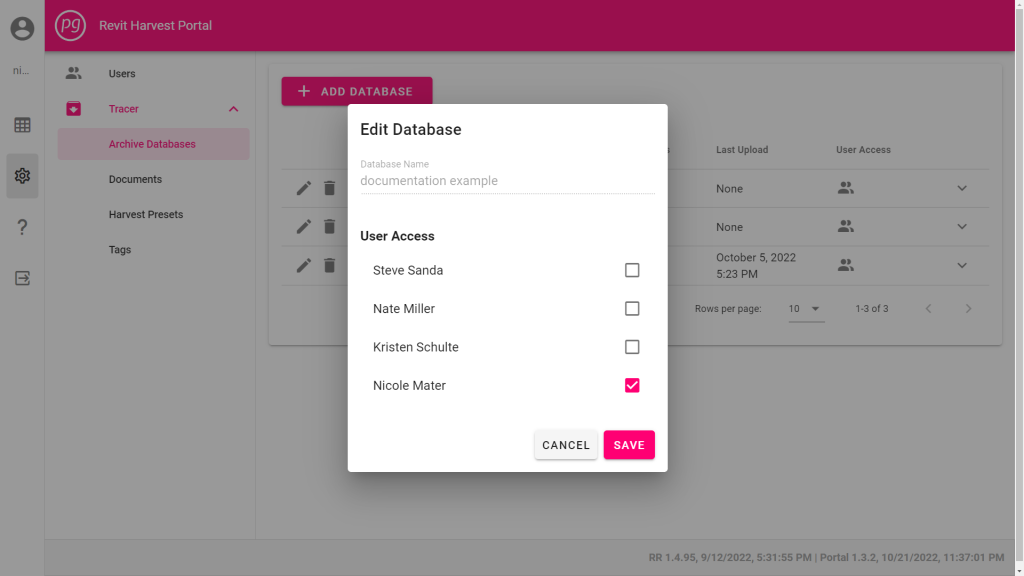
Edit a Database
- In the Database Management Panel, select the Pencil icon in the row for the database you wish to edit. The “Edit Database” window will appear.
- Check and uncheck boxes for each user name to edit User Access to the database.
Note: Database names cannot be edited.
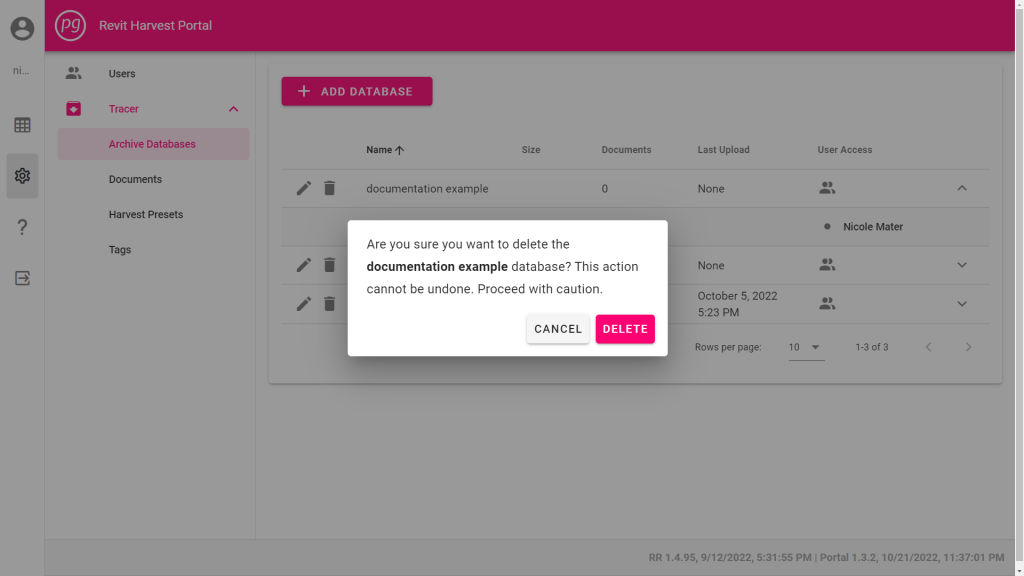
Delete a Database
- In the Database Management Panel, select the Trash Bin icon in the row for the database you wish to edit. A warning window will appear.
- Select “Delete” to permanently delete the database and its data.