Create Rhino Level Text Object
1. (Rhino) Define a text object
Create a text object in an elevation view (Left, Right, Front, Back). The name of the text is what the Revit level will be called. The placement point Z coordinate will be the level elevation.
2. (Rhino) Assign the text object to the Levels category
Assign the text object(s) to the Conveyor Levels category.
Save the Rhino file.
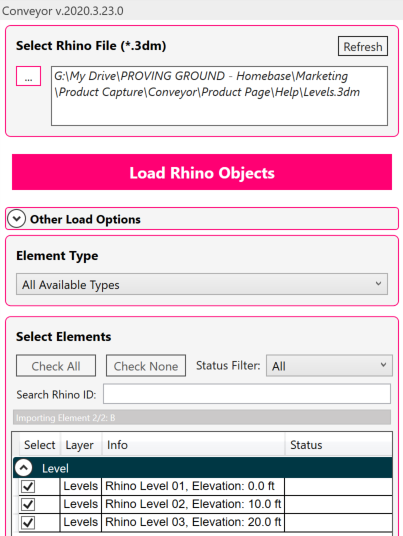
3. (Revit) Launch Rhino Conveyor and select saved Rhino 3DM file
In the Rhino Conveyor panel, select the Rhino 3DM containing the level object(s). Verify the listing of elements and select as needed.
4. (Revit) Load selected levels into Revit
Load the selected levels into the Revit model.

Modify and Update Levels
1. (Rhino) Move the Rhino text up or down in the Z-Axis
Move the Rhino text levels along the Z-axis to change their elevation.
Save the Rhino file.
2. (Revit) Refresh the file in Rhino Conveyor to review changes
Refresh the Rhino file in the Rhino Conveyor panel. Review the updated elements for changes.
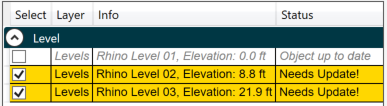
3. (Revit) Load the updated levels
Reload the updated levels. The existing levels will be moved to the new elevation.