Workflow with Rhino – Curve
1. (Rhino) Create curves representing structure centerlines
Draw curves representing the centerlines of structural framing.
2. (Rhino) Assign curves to a structure type
Assign the curves to a structural type defined by the family name and family type.
Save the Rhino file.
3. (Revit) Launch Rhino Conveyor and select saved Rhino 3DM file
Launch the Rhino Conveyor tool in Revit and select a 3DM file containing structure objects.

4. (Revit) Load selected structure into Revit
Load the curve objects to create Revit structural framing or columns.

Modify and Update Curve-based Structure
1. (Rhino) Modify Rhino curves
Modify the curves in the Rhino document.
Save the Rhino file.
2. (Revit) Refresh the file in Rhino Conveyor to review changes
Refresh the Rhino file in the Rhino Conveyor panel. Review the updated elements for changes.
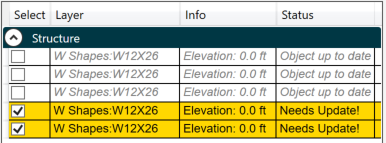
3. (Revit) Update the selected structure
Reload the updated structure. The existing structure will be updated to the new curve conditions.